Paper to Wood
Trace your item onto the paper. Turn the side of the paper you want showing down and trace your item on the back. Make sure you trace your item the right direction so that when you turn it over the paper isn't reversed. Make sure to put the wood to one side of the paper instead of in the middle. That way you will still have paper left over to use again.
Cut the paper just inside the line. You don't want it to hang over the edge. If there are spots that it does hang over, just take a piece of sand paper or a nail file and file it off to make it smooth.
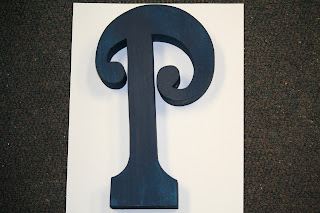
Paint or stain your item. You don't need to paint the front because you will cover it with your paper. I do paint the sides along the front, just in case your paper doesn't go all the way to the edge. Take some Mod Podge or WHITE wood glue (we sell it in the store) and put it onto the wood and spread it with a sponge brush. You just need a light coat. Make sure that it's spread out evenly so there are no globs. Make sure to get the edges and corners well.
Place your paper on the wood and smooth out. Try using a credit card or a Pampered Chef brown scraper to get all the bubbles out. I run my finger over the top to make sure it's totally smooth. There are 3 reasons that the paper bubbles. 1. You have too much Mod Podge/glue on the wood. 2. There was a missed spot on the wood that didn't get any Mod Podge/glue. 3. The underneath layer of Mod Podge wasn't dry when the top coat was put on.
If any paper is hanging over the edge, take some sand paper or a nail file and sand it off. If you are using the WHITE wood glue, don't put a coat over top of the paper. I like to put a coat of Mod Podge over the top of my paper so it seals it, but you don't have to.
Glitter
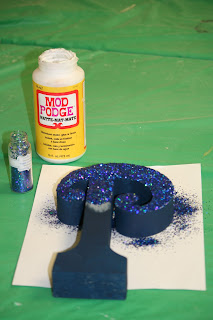
Paint your item, give it a few good coats and let it dry. Get a piece of paper (I just use a piece of computer paper) and lay your item with the side up you want glittered on the paper.
Put layer of Mod Podge over top with a sponge brush. Make sure there are no globs. If it is a large item you can do it in pieces. You can also put another layer of paint on as well, just so it's still wet.
Spread your glitter out onto your wood. It doesn't matter how much you put, just make sure the whole surface is covered. Make sure your glitter matches your paint color. Blue Paint=Blue Glitter. Pink Paint=Pink Glitter.
Dump the excess glitter onto the paper the put the left over back into the container. A little glitter goes a long way.
Let it dry for about 10-15 minutes and spay with a glossy/matte acrylic spray. If you feel like the glitter is still flaking off after one coat of spray, a second coat can be applied.
Distressing
Take a dry sponge brush and dip the top into a little bit of paint and wipe off the excess.
Using light strokes, gently brush the edges. If it's your first time, feel free to practice on the edge of a piece of scrap paper. Try different strokes and see what you like best. (The outside edge going inward, the inside edge going out or just brushing sideways.)
You will be able to see the difference distressing makes.
You can distress the edges on painted or glittered items as well. Distressing is always the last step.
Photo Plaques/Blocks
- Paint or Stain your your plaque and let it dry.
- Have your black and white photo printed on luster photo paper.
- Costco Prices 12x12- $ 3.00 8x8- $ 1.50 5x7- $ .38
- Before you mount your photo, be sure that the t-slot (on the back of the plaque) is at the top rather than the bottom so that it will hang correctly.
- Put Mod Podge or White Wood Glue (NOT the yellow kind) on the front of the plaque with a sponge brush. Smooth over so there aren't any globs. Make sure to coat the edges well. Place your print on the plaque.
- Smooth out any bubbles with a a soft cloth. Run your finger over top to make sure all bubbles are out.
- Let it dry for about 15-20 mintues to be safe. (There are 3 reasons the paper bubbles. 1. You have too much Mod Podge or glue on (There are globs). 2. You missed a spot on the wood so it wasn't covered all over. 3. You put a top layer of Mod Podge over the paper before the bottom coat was dry.)
- Pour a small amount of the Texture Cream for Photos onto your picture. Remember, a little goes a long way. Roll the rolling brush through the cream and evenly spread around the photo. When using the Photo Texture Cream observe the following instructions: Keep away from eyes and skin. Wear vinyl gloves when using. If product contacts skin, rinse immediately. Keep out of reach of children when storing or using the product. Texture Cream and rolling brush are sold at the store.
- Then just let it dry and it's all ready for display!


