I am happy to introduce Erin, from Sassy Southern Crafter, as a guest Blogger today. Erin has been a customer of the store and has posted some of the cutest finished Wood Creations projects on Facebook and also on her blog. I thought she would be a perfect guest for our blog and she did not disappoint. We will be seeing more of Erin's creativity in future guest posts. Thanks, Erin!
Enjoy!

Wood Creations posted a few of their new summer items on FaceBook, and I absolutely fell in love with this one! How fun is this!? It incorporates everything that I love about hot summers. What is not to love about sweets?
Enjoy!

Wood Creations posted a few of their new summer items on FaceBook, and I absolutely fell in love with this one! How fun is this!? It incorporates everything that I love about hot summers. What is not to love about sweets?

The kit is $13.99 sold in the store and includes each wooden piece and the chipboard overlay for the watermelon and ice cream cone. I have all of the basic things as far as paint and glitter, but you can pick up everything you will need to complete a project at their store. I love the convenience of it!

I start all of my wood projects by sanding the rough edges off each piece. If you leave them rough, it is harder to paint and doesn't look as clean when you have finished the project. Once I have sanded my pieces, I paint them. It is a personal preference of mine to paint all sides, even if I cover them with paper. I think it also better protects the wood that goes outside.

After each piece is painted and dried, I apply any scrapbook papers I am using. Be sure to trace your pieces out before you paint them so you don't leave pencil marks on your paint job:) I also cut my papers while the paint dries to save time. Modge Podge works great for papers and glitters. I use foam brushes to apply my Modge Podge. Make sure you apply it evenly and smooth down your paper right away so you don't get bubbles under your paper.

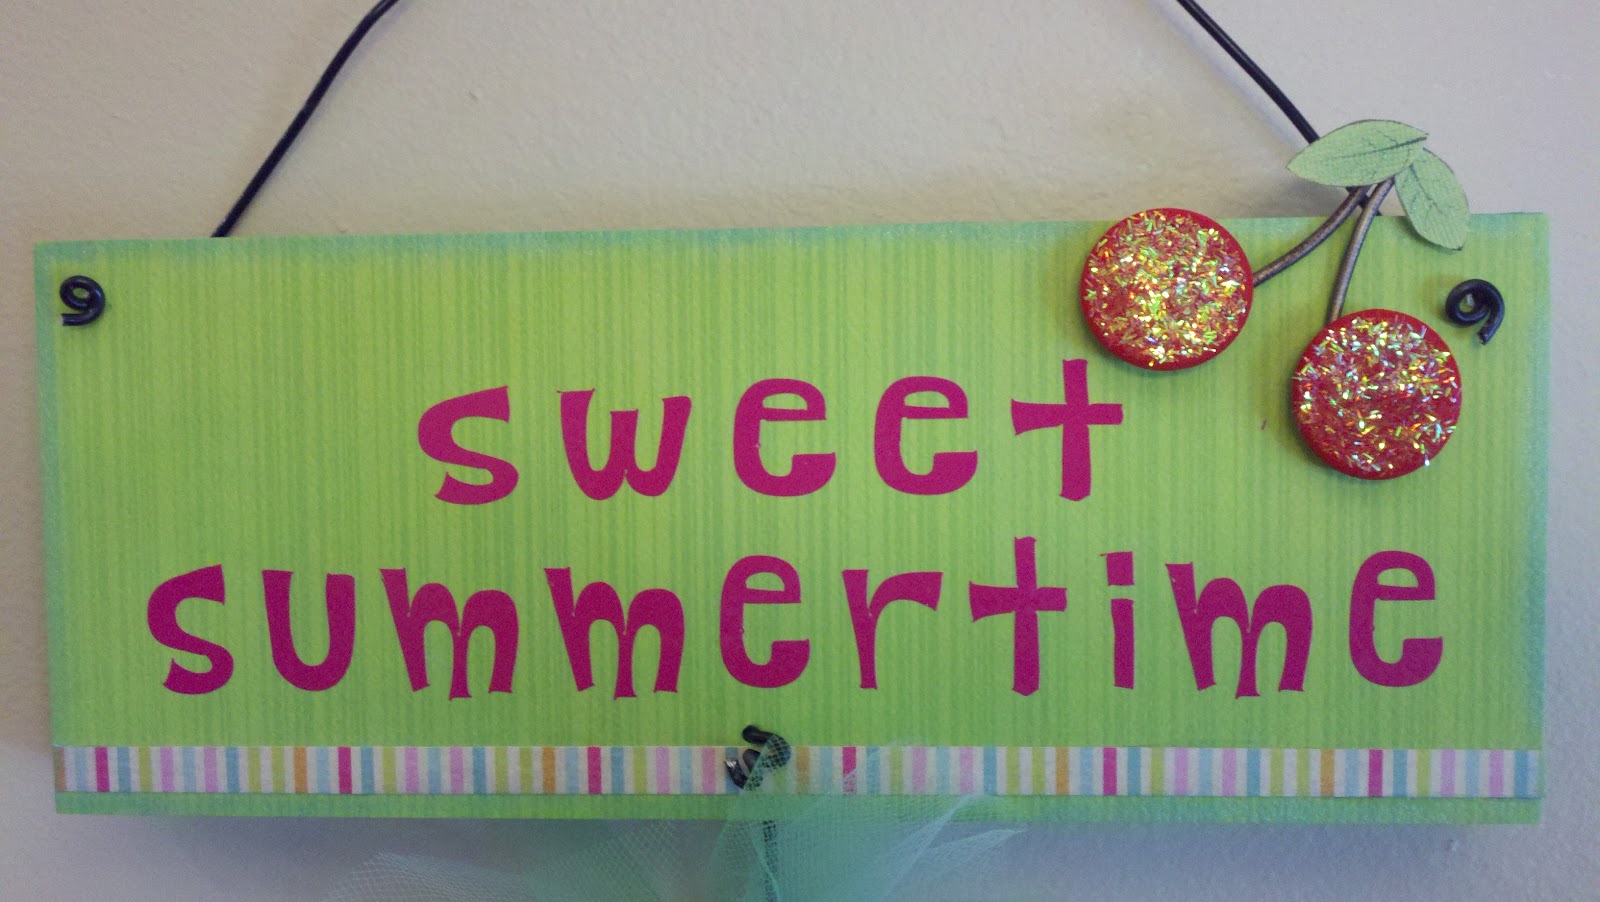
Once the paper has been glued down and is dry, the fun begins. I never really know how the piece will look until I am finished. On the sign, I added the cherries in the corner to tie in the red with the pink...there is a fine line when you mix hot pink and red! I used flat wooden circles, paper to cut out leaves, and a piece of spare brown wire as the stems. I hot-glued the wire to the wood, then topped the wire with the painted (bright red), glittered cherries. On the bottom of the piece, I added a strip of paper from the coordinating back of the paper I used. Once it was all assembled, I chalked the outside of the leaves and the edge of the sign with iridescent green and aqua chalk. The sign was painted with turquoise paint and the glitter I used was an iridescent tinsel cherry popsicle. I like the fact that depending on how the sun hits it, the tinsel changes colors.
The popsicle was fairly simple. I added medium and small orange rhinestones to the orange poka dots on the paper. The wood was painted crocus yellow, and I added lemon drop tinsel glitter to the popsicle stick. The outside edge is shaded with iridescent yellow chalk.

The watermelon base was painted spring green, and the top piece is bright red. For the base, I used sour apple tinsel, and mint fine glitter. I added candy apple tinsel in the cracks on the top piece. The edges are chalked with a red iridescent. To finish it off, I curled black wire for the seeds. Way cute idea shown on the store display. Love it!

My favorite part was the ice cream cone. Here is where the cherry idea came into play. The store has half wooden circles, so I picked one up when I bought the set. I played around with the idea, and to my surprise, it turned out just how I planned it in my head...that never happens! I added the whipped cream with mini rhinestone sprinkles:) I hot-glued the wire first, then topped with the glittered cherry. For the wood, I painted the ice cream turquoise, and the cone royal fuchsia. The cone is topped off with cotton candy tinsel glitter.

Each piece is assembled with black wire. I curled the wire and let 2 inches hang in between each piece. (I bought 2 yards just in case, but 1 yard would cover this project) Once they were all together, I added ribbon and toole to finish it off. Once you finish a project whether it stays inside or goes out, make sure you seal it. I use a matt finish spray seal. You can pick this up at Wood Creations as well. This will allow you to clean your pieces if they get dusty inside and protect them from the elements outside. Be sure to follow the directions on the can so you don't mess up all that hard work. I will usually seal mine after all glitter and before I place any rhinestones. It tends to make them look cloudy. Always put extra coats on anything that goes outside.
This was such a fun project, and looks even better on my front door!!! Thanks to Wood Creations for giving us such fun, cute projects to make! Homemade is better any way you look at it:)
EMB


So cute, I must get me one of those!
ReplyDeletei love how you finished this! It turned out so cute! very creative with the cherries! :)-Chelsi
ReplyDelete